Dynamic DNS with Cloudflare and ddclient: Complete Ubuntu 24.04 Setup Guide
Introduction
When deploying web applications (e.g., blog, VPN, SSH) on a home server,
it is helpful to link the server’s IP to a domain name.
While one may access their home server using its global IP,
the IP is not necessarily fixed but changes dynamically over time.
Nevertheless, keeping track of the home server’s IP is difficult,
and sometimes impossible, e.g., when you are away from home.
In such cases, constantly updating the link between the changing home server’s IP and
a domain name using DDNS (Dynamic Domain Name System) is helpful;
you can access your home server via the domain name, without being aware of the current IP.
Therefore, many people individually acquire their own domains and link them to their home servers’ IPs using DDNS,
and ddclient is popular for dynamic updating the link.
Like many others, I also registered my domain with Google Domains and linked it to my home IP with ddclient.
However, Google withdrew from domain registration service in 2023 and migrated all their domains to Squarespace.
Nevertheless, Squarespace does not support DDNS;
we must edit DNS records manually, which is troublesome for users whose IPs change frequently.
So I changed my domain registrar from Squarespace to Cloudflare,
where it supports DDNS and other convenient networking services.
In this post, I provide a setup manual for ddclient to constantly update Cloudflare’s DNS records.
With this manual, I believe that you can easily (in 10~15 minutes) complete your DDNS configuration.
Prerequisites
- Ubuntu 24.04.3 LTS
- Cloudflare account with domain
- Basic Linux command line knowledge
Step 1: Create Cloudflare API and DNS Record Configuration
Step 1-1: Creating API Token
I assume that your domain has already been registered with or migrated to Cloudflare.
After logging into Cloudflare, you can see your domains as follows; In my case, “masuwaka.net” is shown. Click it.
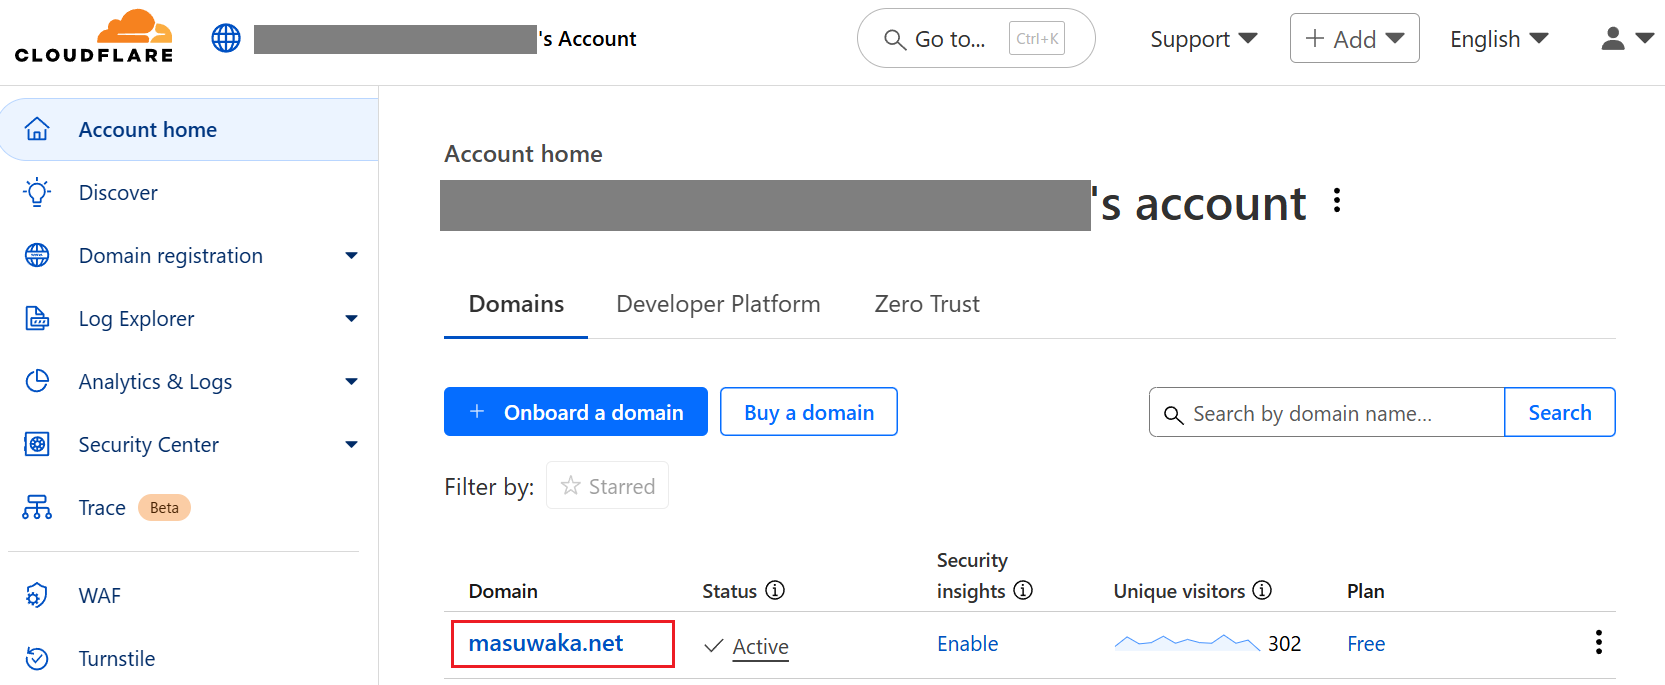
Then, an overview of the domain is shown.
While it’s a little hard to find, a text link of “DNS Records” can be seen on the right-side. Click it.

Then we can see DNS records for the domain.
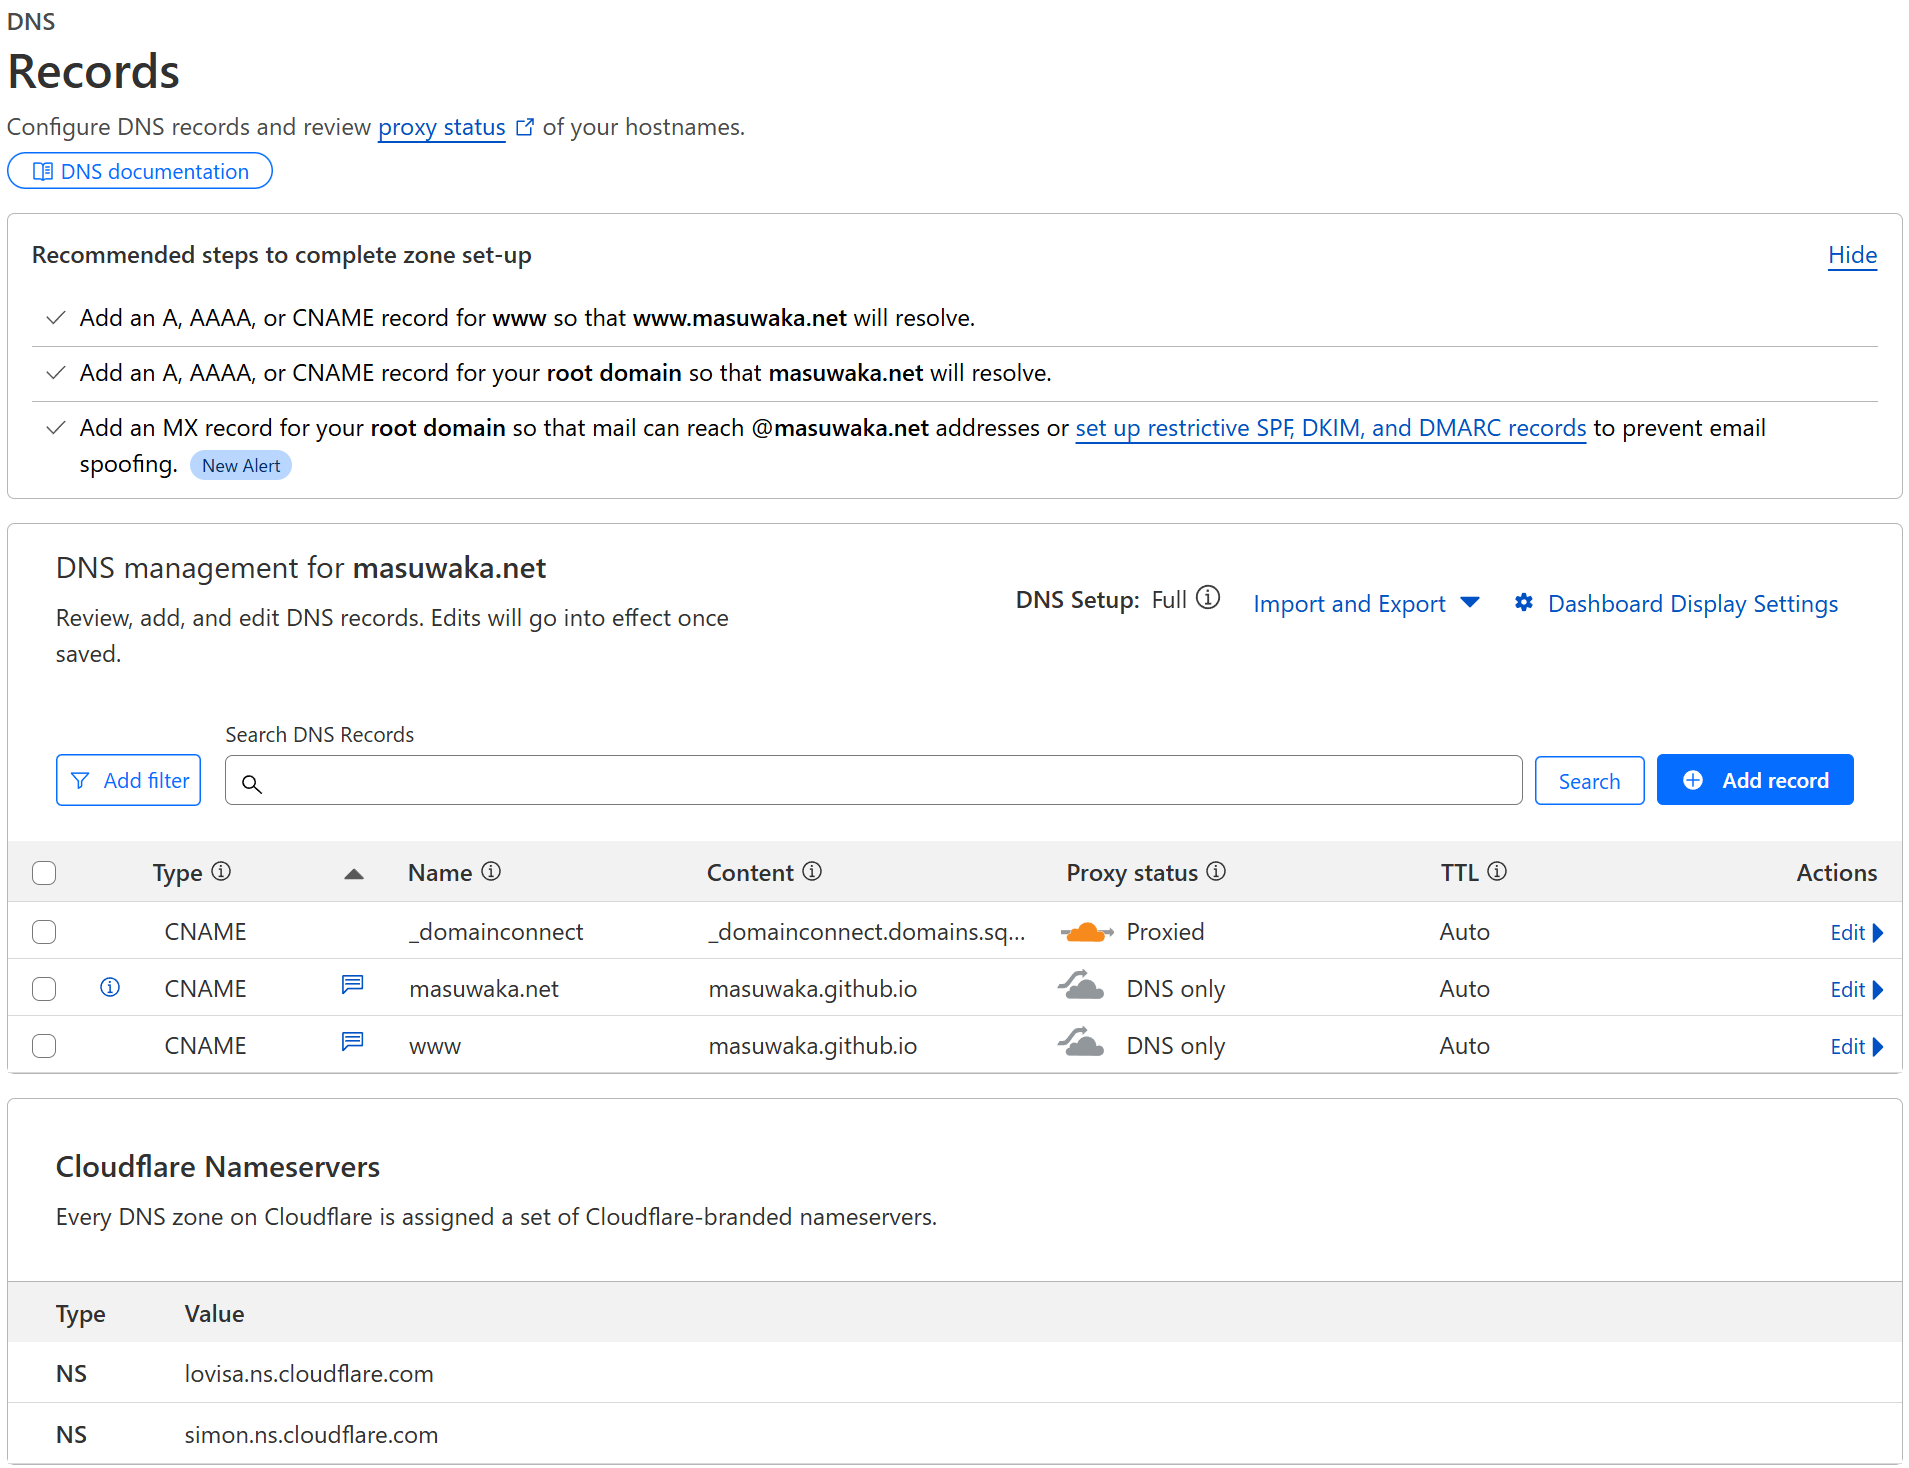
In my case, three CNAMEs are shown.
However you might see only one CNAME record with name “_domainconnect”.
Don’t worry. It is OK and leave it as is for now.
While we will come back to this “Record” page in the next subsection,
we are going to get an API key before editing DNS records;
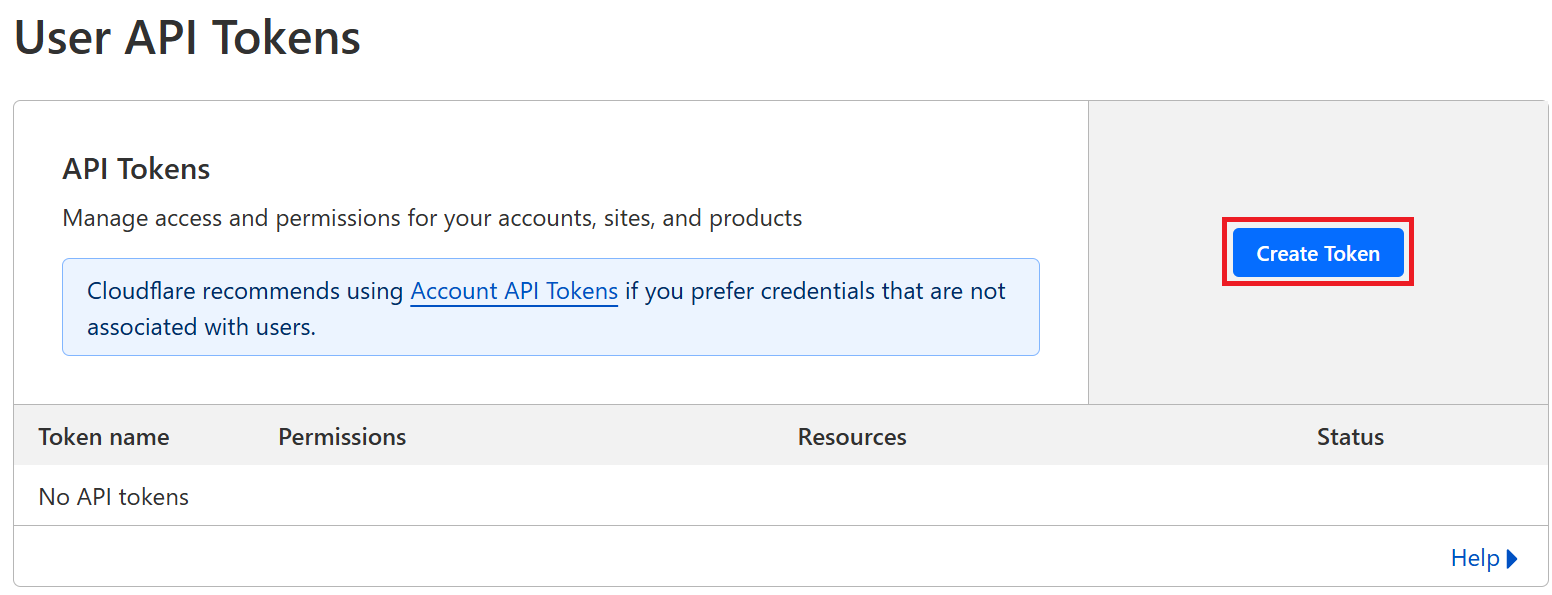
Please go to the page of “User API tokens“
On the API tokens’ page, click the button “Create Token”, and then click “Use template” button for Edit zone DNS.
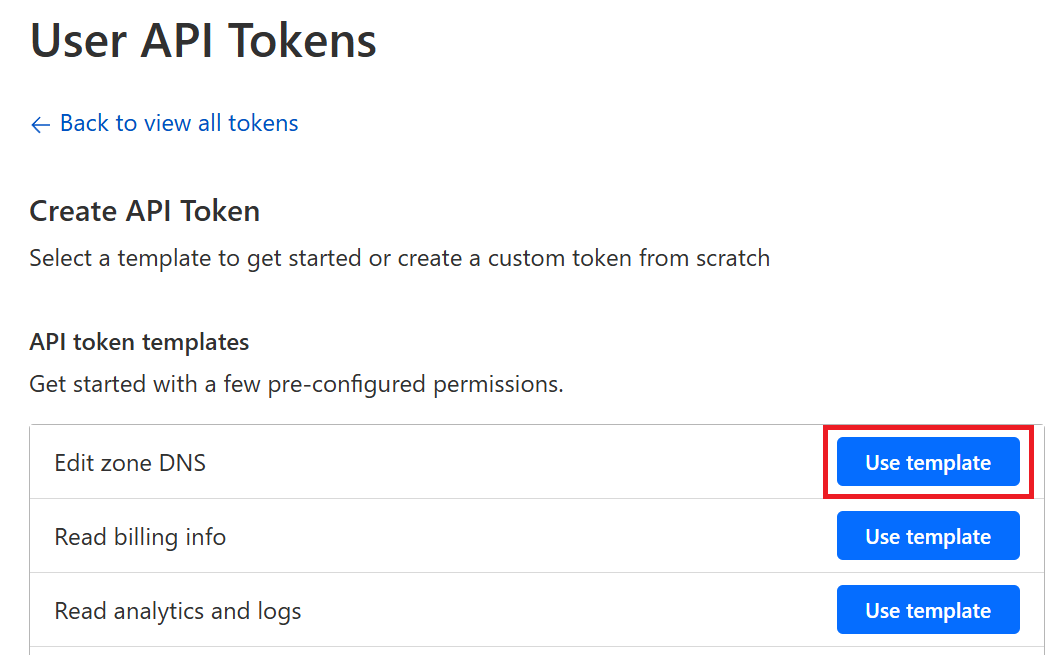
In the template, the only thing you have to edit is the dropdown boxes in “Zone Resources” section unless there is some special reason;
as “include” > “All zones from an account” > “<Your e-mail>’s Account”.
Then click “Continue to summary” button.
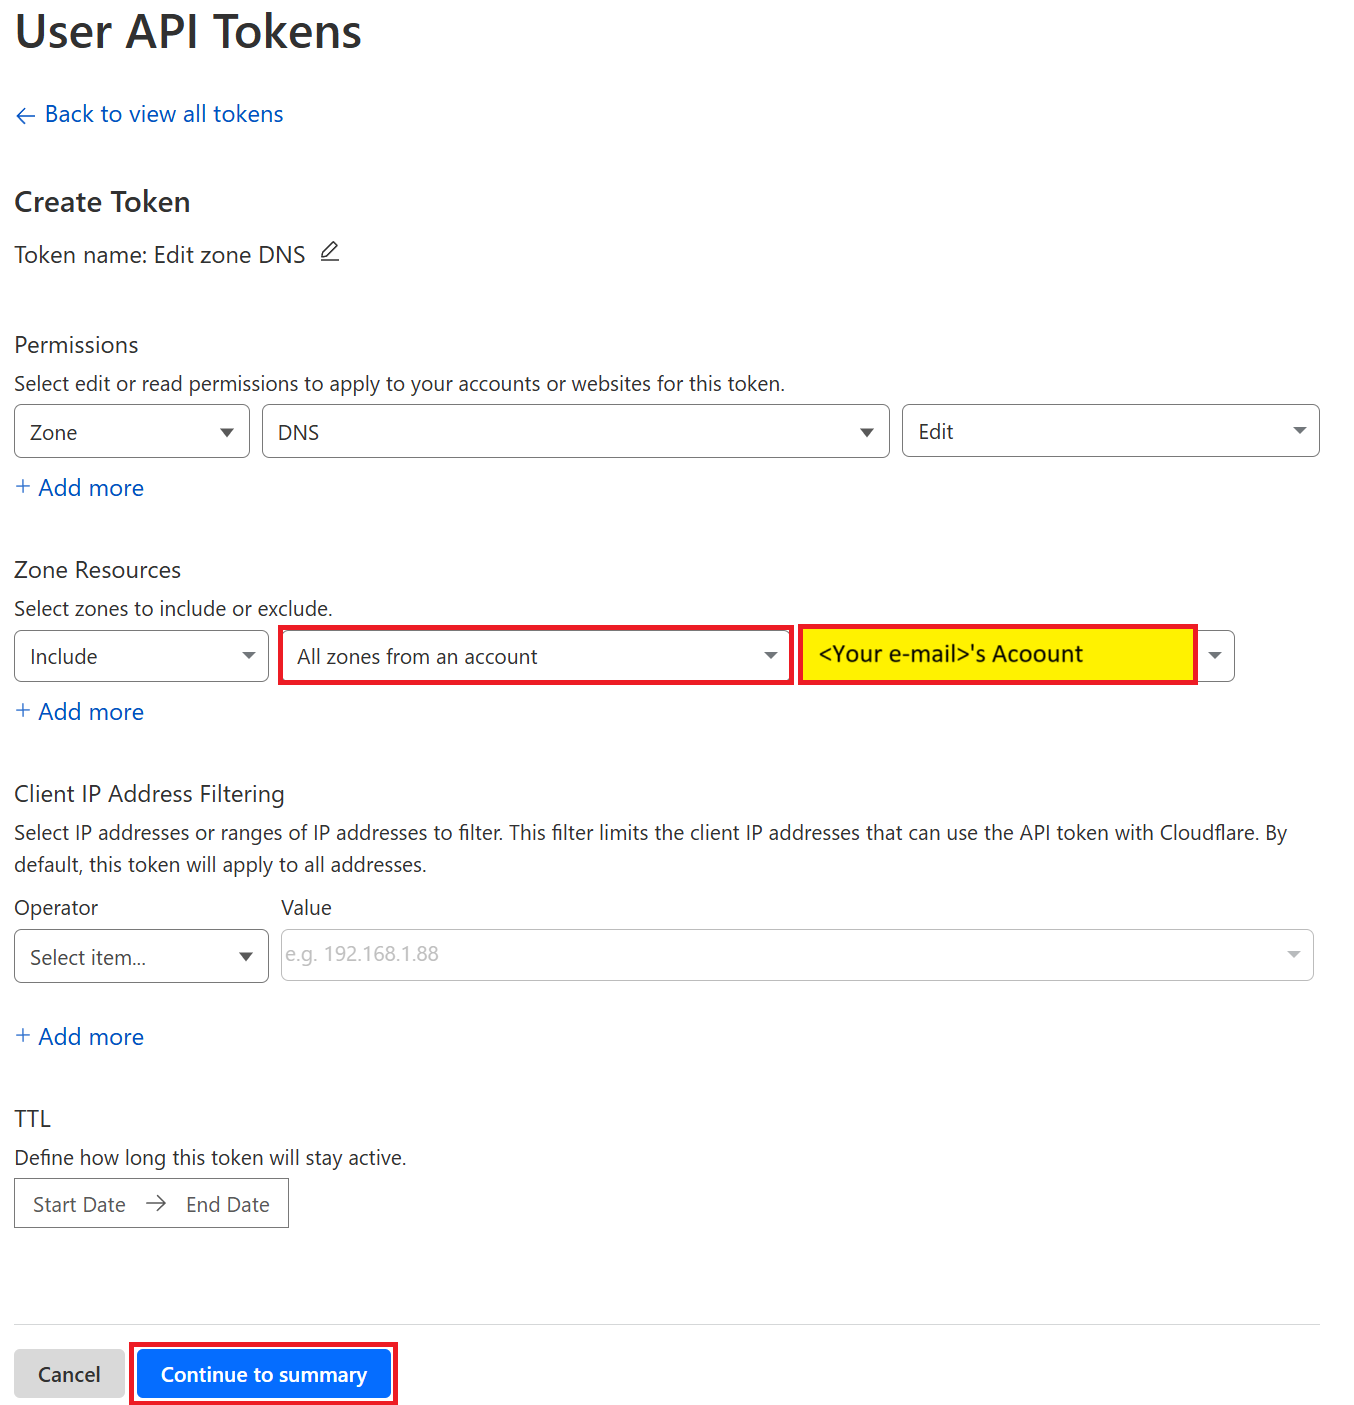
At this time, you will see the confirmation page.
If the content is OK, click “Create Token” button and then API token is created.
Then, please copy the API token and paste anywhere like text-edit app (we will use it later).
It should be noted that the API token created will not be shown again after the page is closed.
Step 1-2: DNS Record Configuration
Back to the “DNS Records” page.
Click “Add record” button and assign A record (IPv4 address) to your domain.
The parts you have to edit are; “Name”, “IPv4 address”, and “Proxy status”.
“Type” will be set to “A” in default and leave it as is.
The “Name” is subdomain and set it to “@” corresponds to root domain, e.g., in my case, “masuwaka.net”.
If you intend to set other subdomain, like “www.masuwaka.net”, input “www” to the “Name”.
It is OK to set the IPv4 address to any temporary values.
In my sample, it is set to “123.123.123.123”.
This will be updated by actual home server’s IP with ddclient later.
Enable “Proxy status” hides the actual home server’s IP from public, protecting the server from malicious access.
Enabling it is recommended for security reason but switch it to off if you directly access the home server.
Editing “Comment” form in “Record Attributes” is optional.
But filling this form with some label makes it easier to identify the meaning of the record.
When setting the DNS record is done, click “Save” button registers the record.
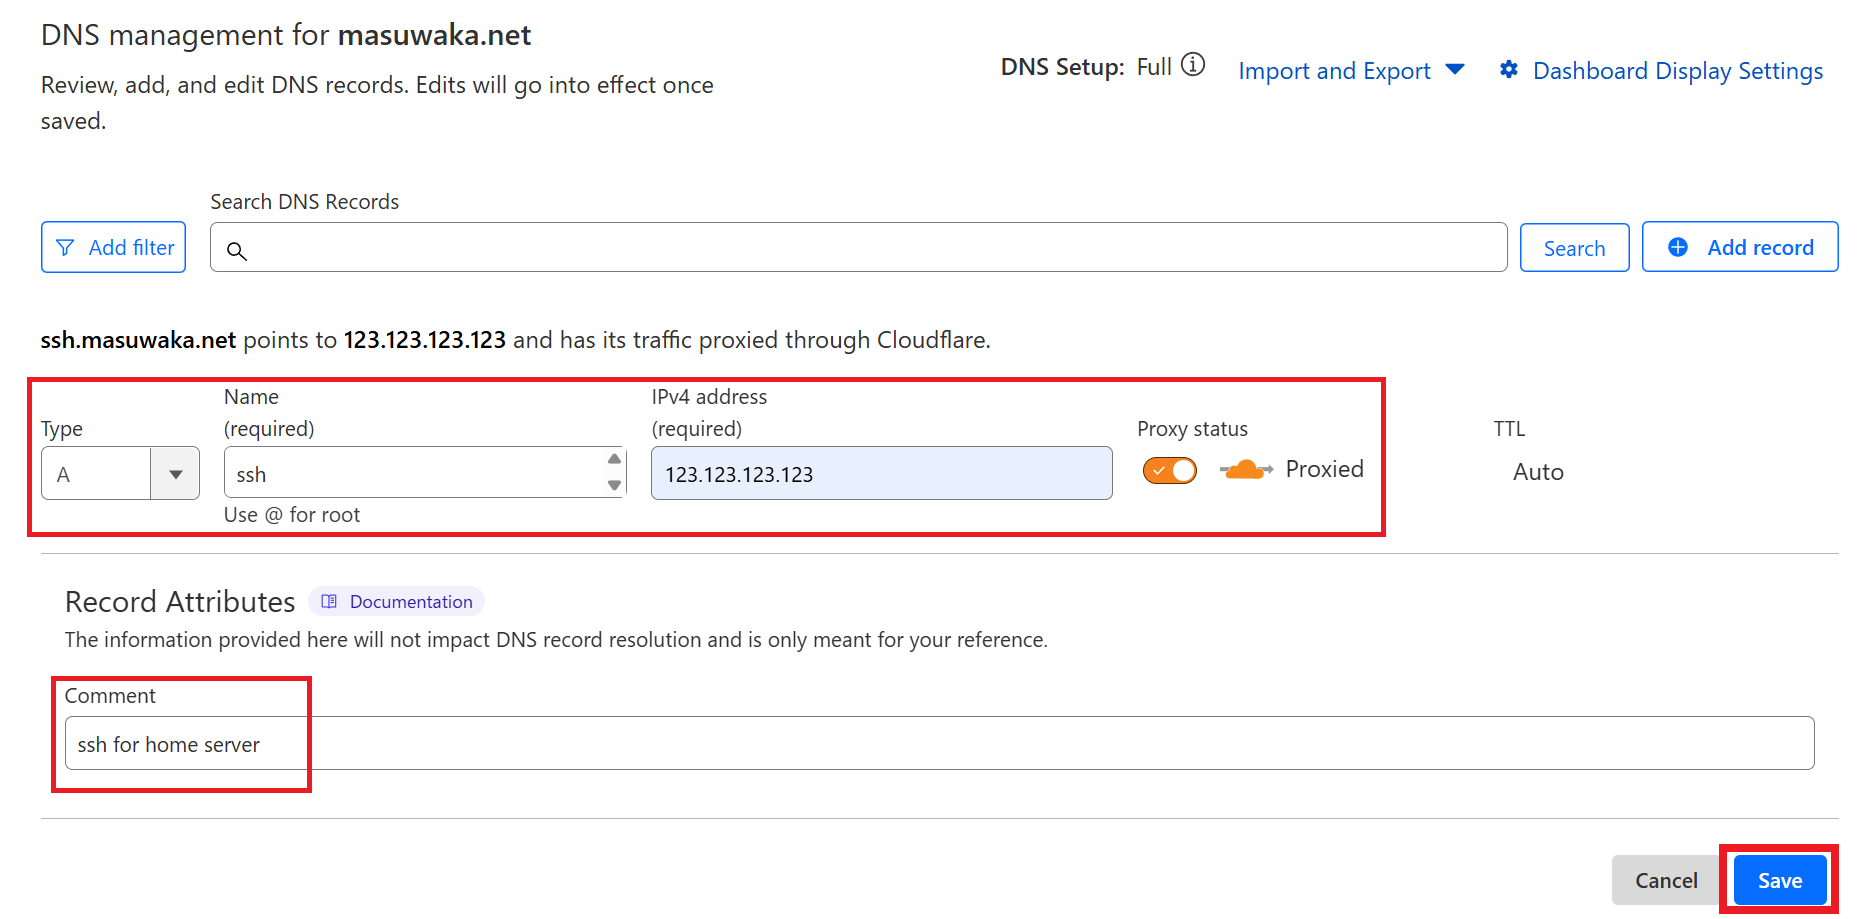
For example, I created two A records;
- “vpn.masuwaka.net” without proxy
- “ssh.masuwaka.net” with proxy.
What is important to remember is that the IPs for both domains are still “123.123.123.123” at this time.
These IPs will be dynamically updated with ddclient later.

Step 2: Installing and Setup ddclient Configuration
Step 2-1: Package Installation
From here, install ddclient package.
The installation is quite simple as follows:
$ sudo apt update
$ sudo apt install ddclient
On installation, you may be asked some questions.
Then, answer them as follows:.
- “DDNS provider”: Choose “other” > “cloudflare”.
- “Username”: Set empty.
- “Password”: Set the API token noted above.
- “IP discovery method”: Select “Web-based IP discovery service”
- “Hosts to update”: filled with the domains registered as A records above.
(in comma-separated fashion, as, “vpn.masuwaka.net,ssh.masuwaka.net”)
If you were not asked to input the above information, or answered differently, don’t worry!
We will check and set them manually later!
Step 2-2: Configuration File Setup
The configuration file of ddclient is /etc/ddclient.conf
Please check and edit it even if you set the configuration in install time.
Because using the preset configuration may lead to failure.
The configuration file must be edited by sudoer, as sudo nano /etc/ddclient.conf:
ssl=yes

protocol=cloudflare \
use=web, web=api.ipify.org \
zone=masuwaka.net \
password='<API token>' \
vpn.masuwaka.net,ssh.masuwaka.net
The points are:
- If “zone” property is none, set it to root domain.
- If “login” property exist, comment out or delete the row.
- Both are OK the API token is wrapped by quotations or not.
- “vpn.masuwaka.net,ssh.masuwaka.net” must be replaced with your (sub)domains registered above.
- Do not miss the backslash.
Step 3: Cloudflare API Testing and IP Update with ddclient
Step 3-1: API Testing
Check access to the Cloudflare API by the following command.
$ curl "https://api.cloudflare.com/client/v4/user/tokens/verify" -H "Authorization: Bearer <API token>"
{"result":{"id":"<some id>","status":"active"},"success":true,"errors":[],"messages":[{"code":10000,"message":"This API Token is valid and active","type":null}]}
The message "success":true indicates the API access is valid.
Step 3-2: IP Update with ddclient
If /etc/ddclient.conf is properly configured,
You can see that the IP addresses for the domains are automatically updated to the home server’s IP.

However, this update may take a while. If you reflect them soon, run the following command:
$ sudo ddclient -force
SUCCESS:  updating ssh.masuwaka.net: IPv4 address set to <home server's IP>
SUCCESS:  updating vpn.masuwaka.net: IPv4 address set to <home server's IP>
Once you can confirm the IP addresses on Cloudflare’s DNS records are updated,
Then ddclient will regularly update DNS records automatically.
Conclusion
In this post, I described how to update Cloudflare’s DNS records with your home server’s IP using ddclient.
This setup provides several benefits:
- Automatic IP updates without manual intervention
- Secure access to your home server via domain names
- Cloudflare’s additional security features when proxy is enabled
Once configured, ddclient will continuously monitor your IP address and update your DNS records automatically, ensuring your services remain accessible even when your ISP changes your IP address.
I hope this guide helps you set up your own dynamic DNS solution!